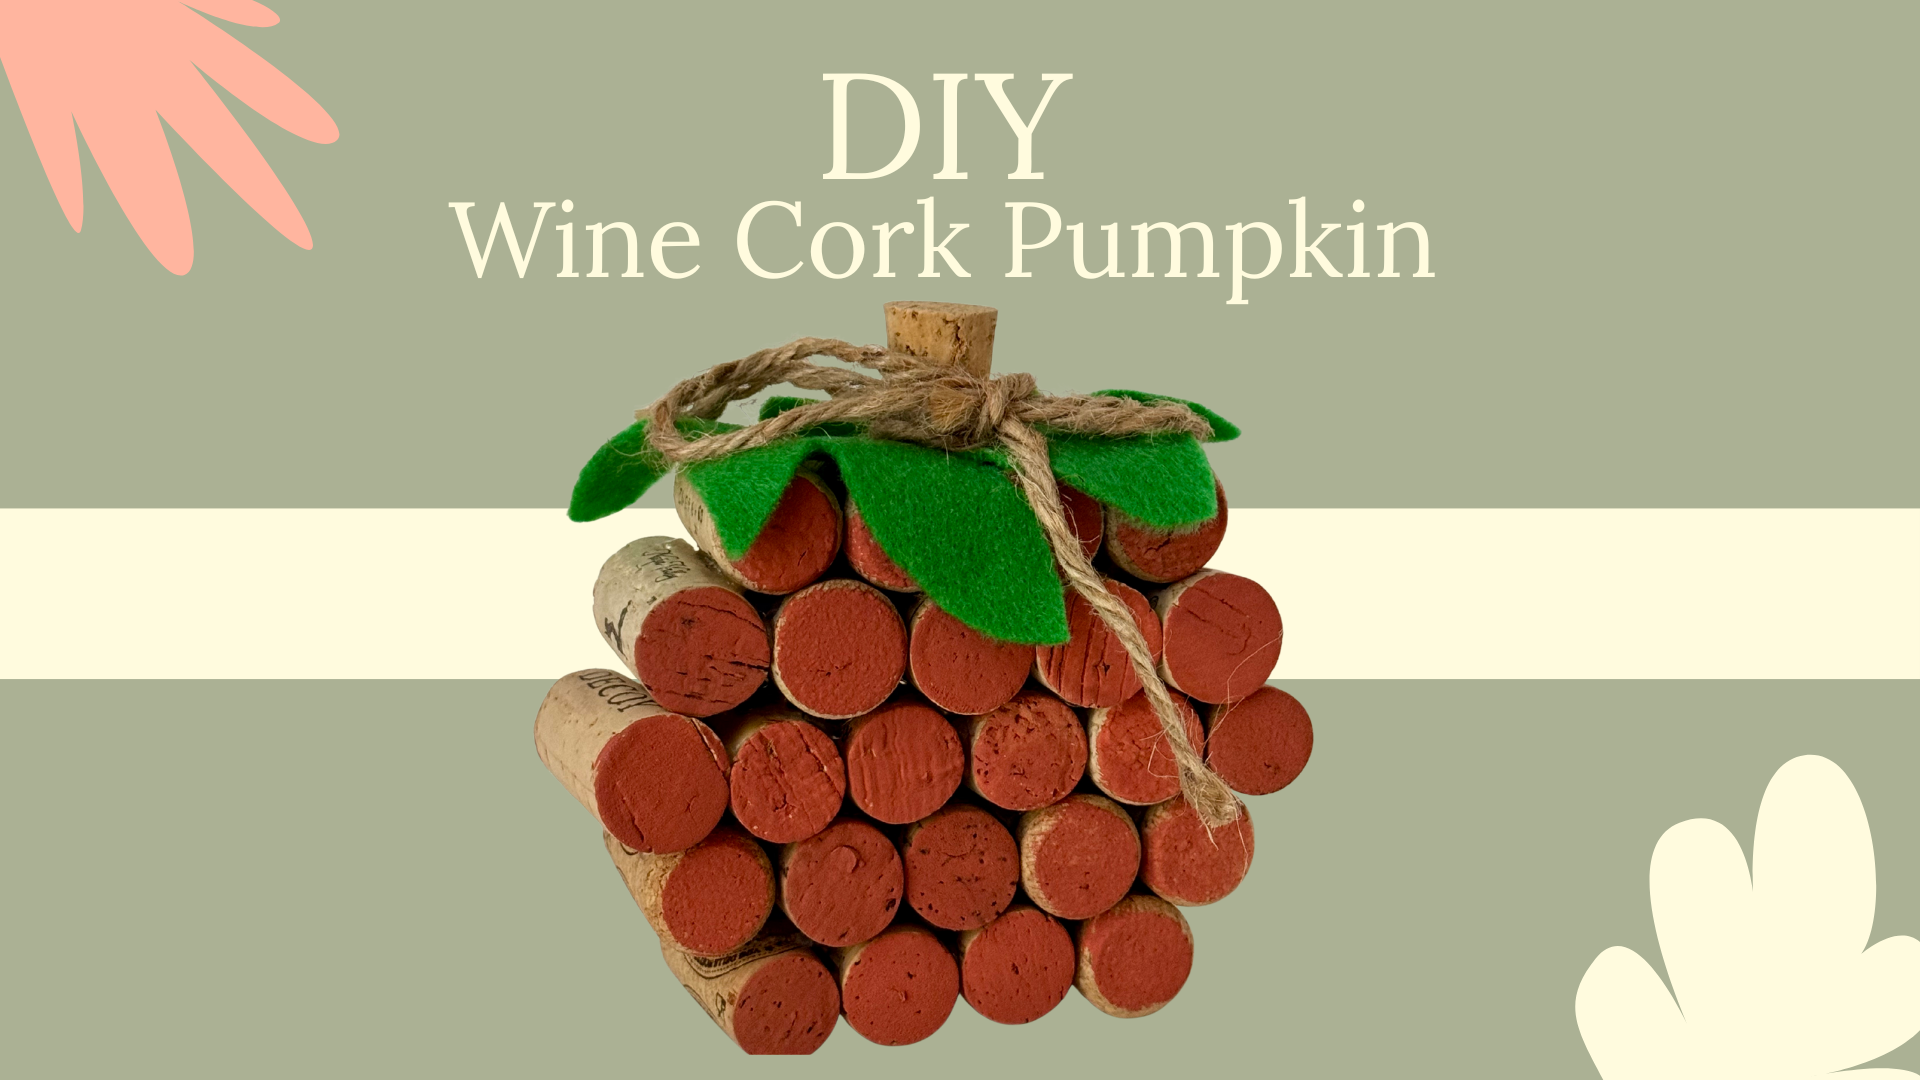
DIY Wine Cork Pumpkin: A Fun & Easy Fall Craft
If you’re looking for a simple, budget-friendly fall craft, this DIY Wine Cork Pumpkin is the perfect way to repurpose all those leftover corks. Just a little hot glue, paint, and creativity turn your wine habit into a seasonal centerpiece that’s equal parts rustic and charming.
I’ve made my fair share of wine-inspired projects (like my Wine Bottle Torch DIY), and this one is easily one of my favorites. It’s quick, festive, and a cute way to decorate for fall — whether you’re hosting friends, styling your dining table, or just want a cozy touch on your mantel. Plus, it’s the perfect excuse to grab a few friends, pop open a bottle, and start saving corks for your next pumpkin.
Why You’ll Love This DIY Wine Cork Pumpkin
- Upcycled & budget-friendly: Put those wine corks to good use instead of tossing them.
- Quick to make: You can assemble and paint it in less than an hour (plus drying time).
- Customizable: Make it big, small, rustic, colorful — whatever suits your fall style.
- Perfect fall decor: Great for Halloween, Thanksgiving, or just autumn vibes.
Materials You’ll Need
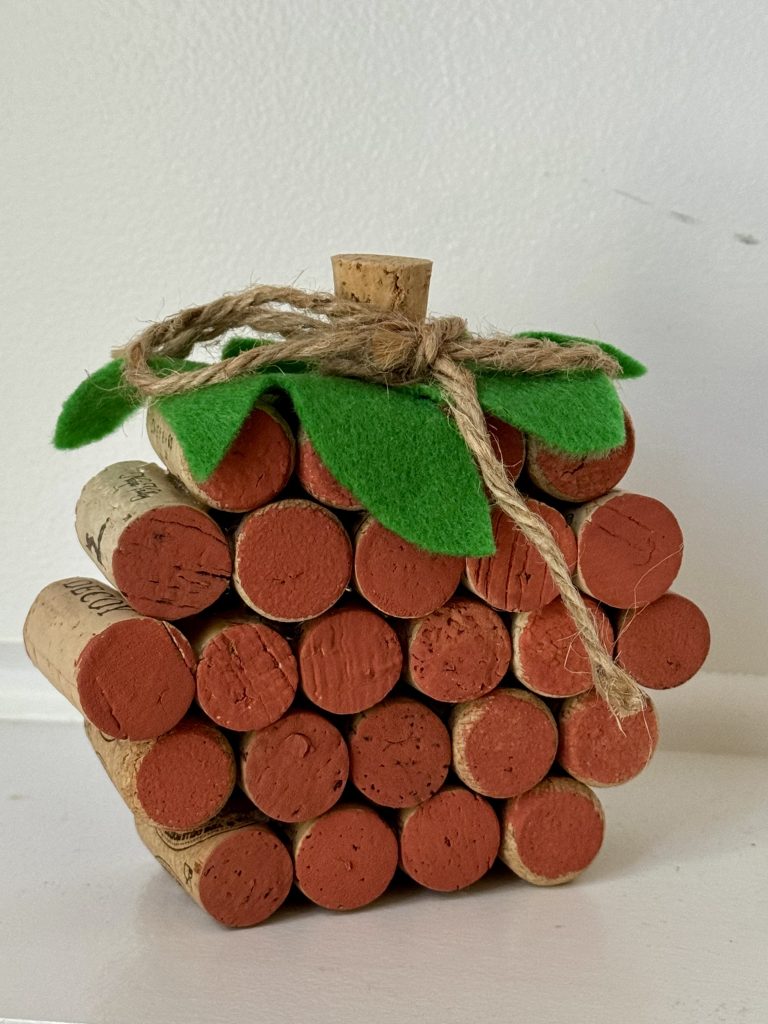
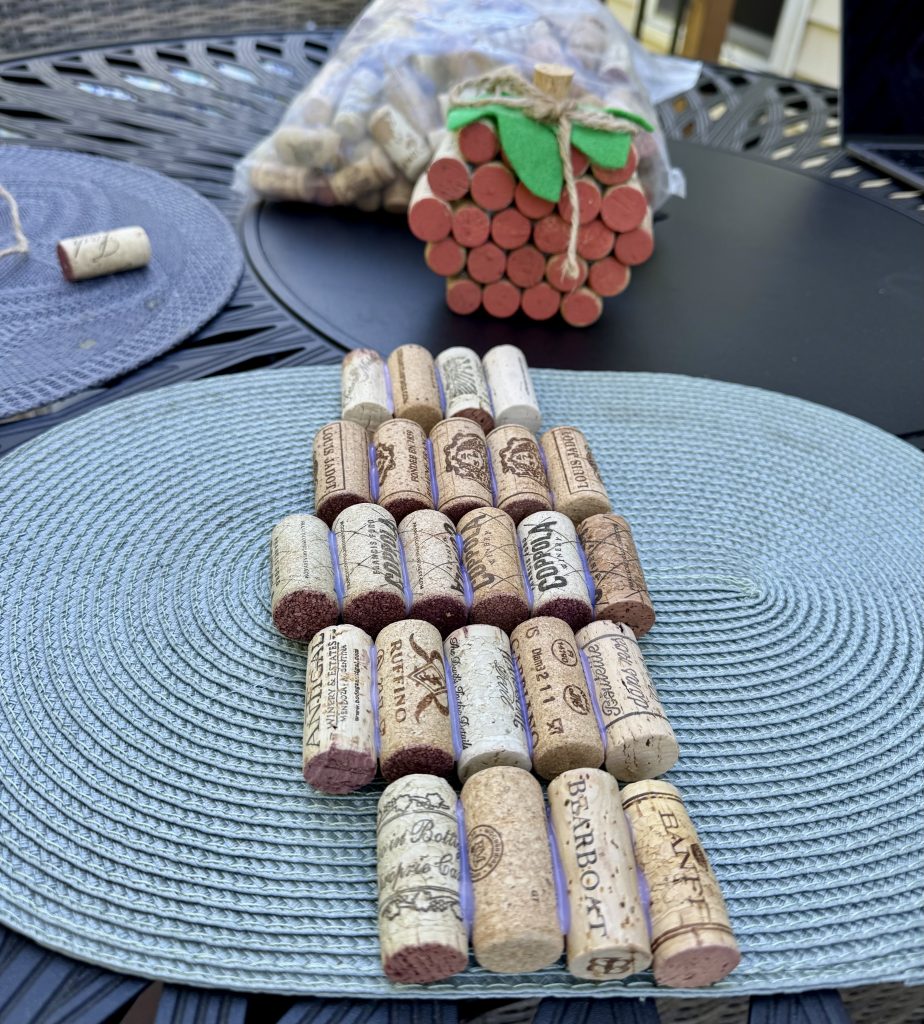
- 24 wine corks (for the body: 4, 5, 6, 5, 4 pattern)
- 1 wine cork (for the stem, cut in half)
- Orange acrylic paint
- Brown acrylic paint (or leave the stem natural)
- Green felt (for leaves)
- Twine (for tying around the stem)
- Hot glue gun + glue sticks
- Scissors (to cut felt leaves)
(Tip: Don’t have enough corks saved? Ask friends to collect them or order a bag of recycled corks online.)
How to Make a DIY Wine Cork Pumpkin
Step 1: Assemble the pumpkin shape
Arrange your corks into five rows:
- Bottom row: 4 corks
- Second row: 5 corks
- Middle row: 6 corks
- Fourth row: 5 corks
- Top row: 4 corks
Glue the corks together side by side in each row, then stack and glue the rows in order to create a rounded pumpkin shape.
Step 2: Make the stem
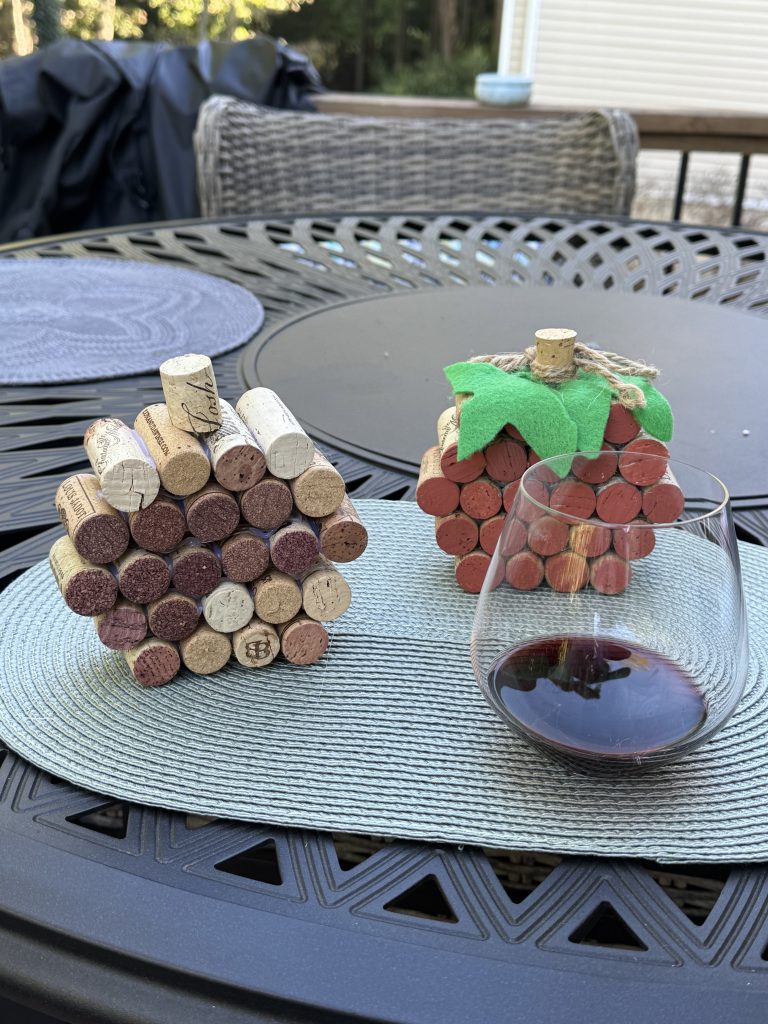
Cut one cork in half and glue the flat side down in the center of the top row. This gives your pumpkin a shorter, more realistic stem.
Step 3: Paint your pumpkin
Once the glue has dried and the structure feels sturdy, paint the front ends of the corks orange. Then paint your stem brown (or leave it natural for a rustic look). Let dry completely.
Step 4: Add leaves and twine
Cut a couple of leaves from green felt and glue them near the stem. Tie a small piece of twine around the top for a simple, rustic touch. You can also use ribbon or faux greenery if you’d like a different look.
Step 5: Display & enjoy
That’s it! Your DIY Wine Cork Pumpkin is ready to brighten up your fall decor. Set it on a mantel, use it as a table centerpiece, or group a few in different sizes for extra charm.
Wrap It Up
That’s all it takes to turn a handful of corks into the cutest little fall pumpkin. I love how easy this DIY Wine Cork Pumpkin comes together — and how it instantly adds a cozy, rustic vibe to my decor.
If you make one, I’d love to see how yours turns out! Share a photo or tag me on Instagram so I can cheer on your crafty side.
And if you’re into wine-inspired DIYs, check out my Wine Bottle Torch Tutorial for another fun project.
*As an Amazon Associate, I earn from qualifying purchases.